Monday, November 18, 2013

Sneak Peek at what is coming with Fuse 6.1

Red Hat JBoss Fuse 6.1 has alot of new features and components.  James Strachan, who works on several Open Source Projects, has written a blog covering some new features of JBoss 6.1, mostly the new version of the Fuse Managament Console.  The FMC is now implemented by the Hawtio Open Source Project.   Also he highlights how you can work with all the configuration in git so all changes are audited and can easily combine Fuse 6.1 with any git Continuous Integration or Continuous Deployment tooling for all your provisioning & configuration data.

http://macstrac.blogspot.co.uk/2013/10/a-sneak-peek-at-whats-coming-in-jboss.html


Producing and Consuming OData with Data Virtualization

The OData Protocol is an increasingly powerful RESTful interface for data access.  It is in the process of becoming an OASIS Specification.  
 
Definition from the OData site: The Open Data Protocol (OData) is a Web protocol for querying and updating data that provides a way to unlock your data and free it from silos that exist in applications today.OData does this by applying and building upon Web technologies such as HTTP, Atom Publishing Protocol (AtomPub) and JSON to provide access to information from a variety of applications, services, and stores.

Ted Jones has an excellent article, link below, that provides an example of how to expose any datasource as an OData source and then consume the source using OData URLs.  His example is shown with Teiid and Teiid Designer which are the community projects for Data Virtualization.  Try out his sample code!

Thursday, November 14, 2013

Fuse Service Works Governance

With the Release of Fuse Service Works v6 Beta, SOA Governance is now included in the JBoss SOA Platform through the Overlord Project.  Three main components are in FSW Governance:

Design Time Governance - This component provides the capability to manage the lifecycle of systems from inception through deployment through subsequent change management. A flexible workflow driven approach is used to enable organizations to customize governance to fit the way they work.  A good article from Kurt Stam, Bleeding Edge Governance - Getting Started

Run Time Governance (was BAM) - This component provides the infrastructure to capture service activity information and then correlate, analyse and finally present the information in a form that can be used by a business to police Business/Service Level Agreements, and optimize their business.  A good video by Gary Brown,  Introducing RTGov 

S-RAMP - "The SOA Repository Artifact Model and Protocol (S-RAMP) TC defines a common data model for SOA repositories as well as an interaction protocol to facilitate the use of common tooling and sharing of data." This component provides a reference implementation for this standard.  A good video by Eric Wittmann,  
SRAMP-101: Everything you ever wanted to know about S-RAMP but were afraid to ask  

Tuesday, November 12, 2013

JBoss A-MQ 6.1 and JBoss Fuse 6.1 ALPHA Available!


Red Hat is now distributing Alpha releases of JBoss Fuse 6.1 - Red Hat's core ESB, and JBoss A-MQ 6.1 - Red Hat's message broker.  Feel free to download either product and take it for a drive.  

The new features in JBoss A-MQ 6.1 include:

* Full support of AMQP 1.0 – provides wire-level compatibility across connections 
* Improved high availability (HA) – embedded message store for shared-nothing HA 

 JBoss Fuse 6.1, which includes JBoss A-MQ 6.1, additionally offers: 

* A vast library of connectors – over 200 out-of-the-box-connector via Apache Camel 
* Managed integration routes - start, stop, measure and trace Camel routes 
 
Visit jboss.org and download JBoss A-MQ 6.1 or JBoss Fuse 6.1 and let us know what you think.


Monday, November 11, 2013

Your First Fuse Service Works Application

Introduction

This blog will show you how to create your first JBoss Fuse Service Works 6 Application.  The application will be a basic application that exposes a simple web service implemented in a Java Bean.  The service will accept a string and add "Hello" such as "Hello Kenny!" which is displayed in the console.  A transformer changes the response to "Hello World!".  We will use SOAPUI as the client to send the SOAP message to the service.

Preparation

Before we get started with the application, install JBoss Developer Studio 7 with the Integration Stack for JBDS 7 as well as the Fuse Service Works 6 Product.    You can find the instructions  for installation in addition to the downloads at http://www.jboss.org/products/fsw.html.  Also install SOAPUI which can be found at http://www.soapui.org/, either standalone or the eclipse plugin (http://www.soapui.org/eclipse/update).

Step Overview

The following describes the steps that we will follow to build and deploy our application:

1. Start JBoss Developer Studio
2. Create a new workspace
3. Create a new Switchyard Project
4. Create a Bean component and its contract
5. Add the Business Logic of the bean  and the details of the contract
6. Promote the Service and create the transformation
7. Create the SOAP binding
8. Deploy the Service
9. Test the Service

Step By Step

Step 1 : Start JBoss Developer Studio

I have different installs and version of JBDS so I start this particular instance from the command prompt.  The blog assumes you have the software installed as described in the Preparation section.  You can start JBDS from the command prompt, Program Menu Item or desktop launcher.


Step 2 : Create a new workspace

Create a new workspace, I used /home/kpeeples/workspaces/fsw-gettingstarted


Step 3 : Create a new Switchyard Project

Select the New Switchyard Project Wizard.

We will take the default on the first screen of switchyard-example.  Click the next button.  On the second screen, the switchyard project configuration, change the Runtime to "none" as we will deploy to the server after creation.  Select the Switchyard version of 1.0.0.Final.   Select the Bean Implementation and the SOAP Gateway binding.  Then click Finish to create the project.

The editor which consists of the canvas and palette will be opened.


  • The Canvas, shown in Blue, is our workspace where we will create and manipulate project elements.
  • The Palette, shown on the right side, contains the elements that can be added to the project.
Step 4 :  Create a Bean component and its contract

To create a new bean component, select the Bean implementation icon from the palette and drag to the canvas.  The Bean definition dialog will open.  Type HelloServiceBean in the Name field and then click on the interface link to create the corresponding contract/interface.  Enter HelloService for the interface.  Then click Finish for the interface and Finish for the bean.

Step 5 : Add the Business Logic of the bean  and the details of the contract

Add the following code to the bean and it's interface:

HelloService.java
package com.example.switchyard.switchyard_example;

public interface HelloService {
 String sayHello(String helloString);

}
HelloServiceBean.java
package com.example.switchyard.switchyard_example1;

import org.switchyard.component.bean.Service;

@Service(HelloService.class)
public class HelloServiceBean implements HelloService {

  @Override
    public String sayHello(String helloString) {
      System.out.println("Hello: " + helloString);
      return "Hello " + helloString + "!";
    }
}

Step  6 : Promote the Service and create the transformation

In this step we promote the service to make is visible by clicking on the promote service button or right click on the service's green icon and select promote service.  The service should be visable as a web service so we select WSDL as the interface type.  Then click interface to generate the WSDL based on the contract/interface that was defined earlier.
Click next to specify the WSDL options.  Uncheck the wrapped messages so transformations can access only what is inside the elements they receive.  Click finish which will show the interface  and service name.  Make sure to leave the create required transformations checked so we can define our transformer.

Click next.  Leave both transformer types checked and the type as a java transformer.  Type in the name as ExampleTransformer and click finish which will show our composite-service and our bean component.
Open the Transformer class and add the following code.
ExampleTransformer.java
package com.example.switchyard.switchyard_example;

import org.switchyard.annotations.Transformer;
import org.w3c.dom.Element;

public final class ExampleTransformer {

@Transformer(to = "{urn:com.example.switchyard:switchyard-example:1.0}string")
public String transformStringToString(String from) {
// TODO Auto-generated method stub
String to = "Hello World!";
return "<sayHelloResponse xmlns=\"urn:com.example.switchyard:switchyard-example:1.0\"><string>"
+ from + " TRANSFORMED TO " + to + "</string></sayHelloResponse>";
}

@Transformer(from = "{urn:com.example.switchyard:switchyard-example:1.0}string")
public String transformStringToString1(Element from) {
// TODO Auto-generated method stub
return new String(from.getTextContent());
}

}

Step 7 : Create the SOAP binding

Go to the canvas and click on the create binding button on the composite-service.  Select the SOAP binding from the menu.   Keep the defaults and click on Finish.

Step 8 :  Deploy the Service

Now we can deploy our service.  I already added the Fuse Service Works Server in the IDE and started the server.  Right click on the project and indicate to Run As/Run on Server.  Take the defaults to deploy to the server.  The Application should deploy as shown below.  The WSDL should be accessible at http://localhost:8080/HelloService/HelloService?wsdl

Step 9 : Test the Service

Create a new SOAPUI project with the WSDL.  Enter Kenny as the string for the request.  Submit the request.  On the console Hello: Kenny displays.  In the SOAP response Hello Kenny! TRANSFORMED TO Hello World!  because of the code in the transformer.  You have created your first simple Fuse Service Works Application.


Monday, November 4, 2013

Enhancing your JBoss Integration with JBoss BRMS in Practice

In the previous article in this series, we talked about extending and expanding your enterprise integration to account for an expanding architectural landscape that included diverse backend systems.

In this article we want to provide an example project, called the BRMS Fuse Integration Demo, that demonstrates how to achieve some of the discussed use cases, specifically how to integrate your service bus with a business process engine.

Introduction

The main focus of this article will be an actual integration project that provides you with an architectural blueprint for calling out to your Red Hat JBoss Business Rules Management System (BRMS) engine from your Red Hat JBoss Fuse service bus messaging routes. The use cases that were discussed in the previous article were as follows:

Use cases

  • call JBoss Fuse (Camel) services from a business process (BPM)
  • call JBoss BRMS to apply rules from JBoss Fuse (Camel) route, such as content based routing rules
  • call a business process from a JBoss Fuse (Camel) route
The project we provide covers the last use case, where we want to trigger a business process from one of our JBoss Fuse (Camel) routes. Our project provides the following aspects to provide you with a quick way to get started and an architectural blueprint.
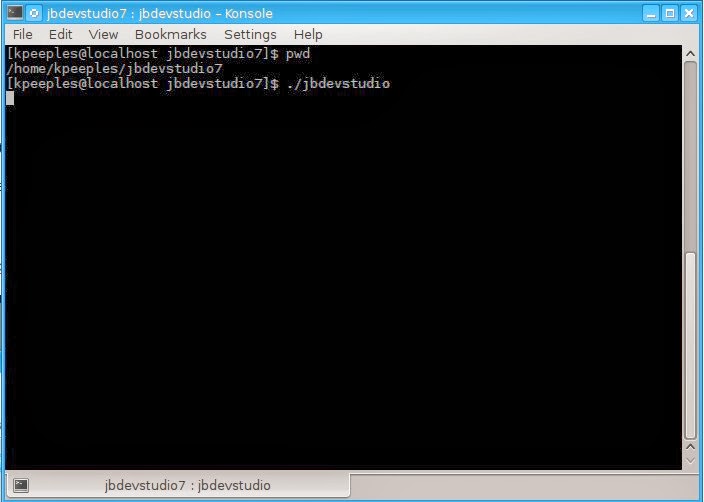
Example project

  • Automated installation of JBoss Fuse
  • Automated installation of JBoss BRMS
  • Example BPM project deployed to JBoss BRMS
    • Process is a three step process (Start → “Hello World” → End) that logs a message on execution
  • Example (Camel) route deployed to JBoss Fuse
    • Fuse (Camel) route that is triggered by messages from a specific data directory
    • Logging of message from route
    • SOAP Web service call from route to collect external information
    • REST service call from a Bean from the camel route to start the external business process

JBoss BRMS and Fuse demo project

The reference project shows an example of integrating JBoss BRMS with a focus on the BPM component and JBoss Fuse. The environment consists of a JBoss Fuse instance with a Fuse (Camel) deployment and a JBoss BRMS instance with a BPM project. We touched on the business process, but let us examine the rest of the projects in more detail. We have designed our architecture to loosely couple the business process allowing access by other components, like our JBoss Fuse example project, by using a REST client from our Camel route.  The REST client uses the Process ID and the proper user credentials to start a new instance of the business process.

Peek under the hood

The demo project will execute a lot of the mechanics out of our sight, so let us take you on a tour of what is happening under the hood of our project. If all goes according to plan it would step through our project as follows:
  1. The src/data directory defined in the Camel route is checked for xml messages which contain a stock code in a SOAP message.  In our example we are using RHT as the symbol to get stock data on from the external SOAP Web Service.  Open up the message1.xml file to see the sample SOAP envelope and body.
  2. When a xml file is found then the body of the message is read in and displayed in the log message.
  3. Next the message is sent to the external SOAP web service to get the stock information.
  4. The response that is returned is then displayed in the log message.
  5. Next the startProcessFromCamel method in the RestClientSimple is called to start the business process that prints hello world. Additional information on calling the RestAPI that is provided by JBoss BRMS BPM component is found below. As noted in the section Future work, the stock data will be sent to to the business process.
  6. The process id is displayed in the log message.
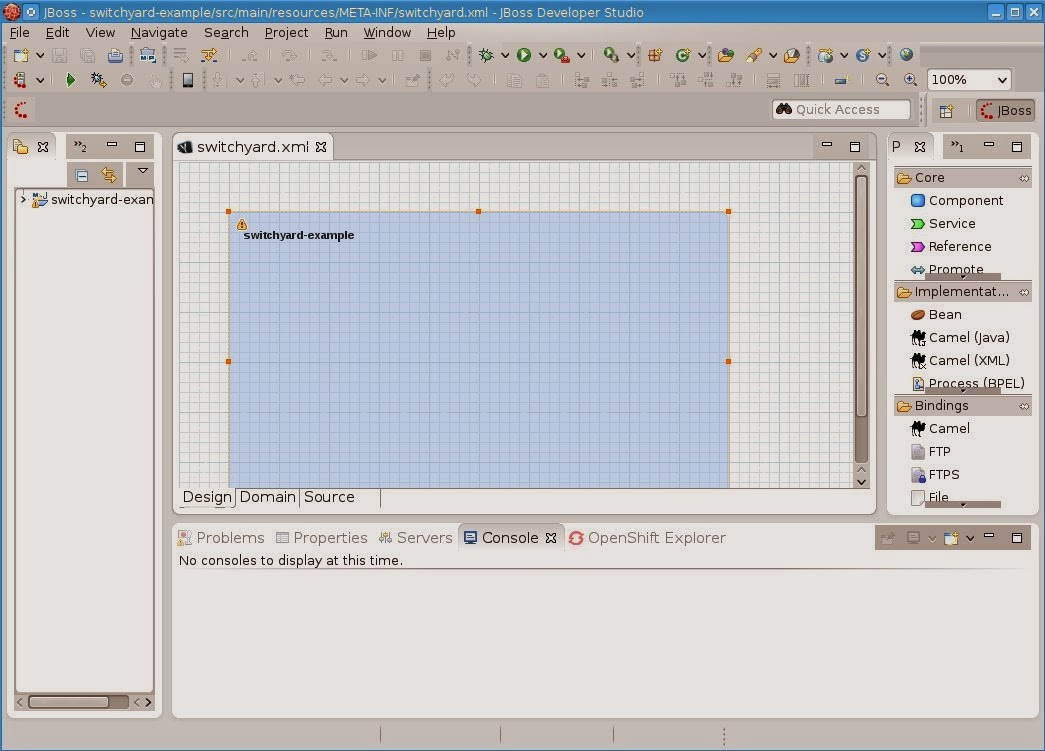
The Fuse Component

The Fuse project starts with our simpleRoute project, which contains two parts.  The first is our RestClientSimple class, which allows us to define the business process ID and the user credentials.  We need this class in when dealing with starting our process through the JBoss BRMS BPM RestAPI.  The second is our camel-spring.xml file which contains our bean and route.  A bean is defined with startit as the ID and RestClientSimple as the class.

Here is a closer look at a section of the camel-spring-xmlfile.

<bean id="startit" class="com.jboss.examples.RestClientSimple"/>
<camelContext trace="false" xmlns="http://camel.apache.org/schema/spring">
<route id="my_Sample_Camel_Route_with_CXF">
<from uri="file:src/data?noop=true"/>
<log message="&gt;&gt;&gt; ${body}" loggingLevel="INFO"/>
<to uri="bean:startit?method=startProcessFromCamel"/>
<log message="&gt;&gt;&gt; ${body}" loggingLevel="INFO"/>
</route>
</camelContext>

Note that the SOAP web service call to get stock data and then the call for the startProcessFromCamel method in the RestClientSimple class.  We aren't currently passing the stock data to the business process, but that is possible, see the section on future work. Our RestSimpleClientgives three options for interaction with our JBoss BRMS BPM deployment.
  1. RestClientSimple starts a process without parameters
  2. RestClientStartWithParam starts a process with parameters
  3. RestClientTask starts a process and complete a task with form data
In our case we are will be  using the first option, but for more information on the RestAPI see the Red Hat Customer Portal Knowledge base article.

Future work

This article has demonstrated how to integrate your service bus with a business process engine. This example project solved only one of the use cases and there are interesting extensions that could be added.
  • The business process can be replaced by a more extensive example process, such as the Customer Evaluation Demo to show both BPM and rule integration.
  • Parametrize the REST service such that diverse processes could be called.
  • Pass the Stock data that was looked up in the Camel route as a parameter into the business process for display like the current Hello World.
  • Deploy the SimpleRestClient service in apart bundle within JBoss Fuse container. Currently it is a bean in the route but it could be set as a proxy service that would receive a processID, user name, and user password.)
These extensions we leave for you to work out, like homework exercises, as you explore the integration scenarios that JBoss BRMS and JBoss Fuse can solve for you.

(Co-authored by Kenny Peeples & Eric D. Schabell)